
Drill 6 Part 8
I have made the texture for the dress in ostridge skin from a sample of upholstery that my gave me, I'm going to make the entire texture bigger so don't worrie. I have changed all the rivets in the entire character to pitted silver!! The scene isn’t properly lit yet so the renders are as plain as they will ever get. I will obviously do good renders at the end for the 12 hours. We finally will be taking a z-brush class this semester so I might be able to use this for a weekly project just to apply displacement and bump maps properly. I also texture the chest plate and straps, everything so far is hand painted without filters!!


Drill 6 try 1 Part 7
Here is what I have rounding off-hour 7; I have done all the painting on the arm armor and the weird ball on the helmet. I'm going to try and do the dress and the boots next. The skin on the body is yet to be unwrapped, that will be the hardest by far and the most complicated to paint. Once I get the PSD on the object, any changes will be made near the end as long as the main texture is in a PSD they are not set in stone!!


Drill 6 try 1 Part 6
This is what I have to finish up hour 6, the only thing left to do is unwrap the skin portion on the arms and torso. The rest is in UV stamps. I’m feeling too sick tonight to continue so ill pick it up in the morning after I take my daughter to school.


Drill 6 try 1 Part 5
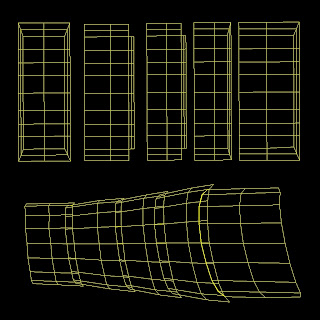
Here is some screen shot for progress, I unwrapped the blue area/torso and part of helmet- the green areas are yet to be unwrapped.


Drill 6 try 1 Part 4
Here is how it looks for the unwrap. The armor under the glove on the right side is unwrapped, I also unwrapped the boots. This is the first time IV done this much unwrapping so...I plan to work swiftly into Photoshop with all the texture stamps pre-loaded all at once for painting. That will still be a few steps away.


Drill 6 Try 1 Part 2
Here is what I had at the end of hour 3. I unwrapped the UV's on the hand and arm armor, laces in the front abdomen and the connecting rings. I will attach the stamps so yal can see them.


Drill 6 try 1 part 2
Here is what I had after 2nd hour completed; the pieces that I have unwrapped are black with red swiggles to show that I have a PSD preloaded to that object made from the stamped UV. The unwraps took most all the time doing it face by face and then reconnecting the pieces and straitening them all out, I had to stop here and there just to check the DVD for the odd thing so sitting time was actually longer. I put in the projections off the UV stamp to show that I did it properly.


>:D


>:D
Drill 6 try 1 part 1
I have UV maps to show my first hours texture progress; they are not all complete yet so ill show UV maps on hour 2. I have to leave the school now so ill be posting starting in the morning until 5 in the afternoon. The character will be just as it is shown in the paintings on the earlier posts. If I only knew Z brush......... next semester!!
Drill 6 try 1 Part 0
Here is what IV doesn’t to get the character ready for texturing. I will be starting after I watch a bit of an unwrapping DVD I got yesterday. I modeled all the little things so it looks more accurate.


Willy the Raccoon's character
Willy the Raccoon's character sheet for Maria's Animation and our anpro class. I modeled this character and Justin modeled the firefly. The character is displayed with non subdivided polygons, when I finish the logo for his jacket ill post another smoothed one for yal to see. The character (will-might) have fur by the time we finish the short....we hope!!!, so keep that in mind. I-oh-render away!! >:D


Nebula's today renders/screen shots
Nebula scooter: This is what Willy the main character in our anpro short gets around on.
Here is some of the renders I did in class today, I need to teak the chrome and glass a bit still. The character sheet/screen shot of the scooter has non sub-divided polygons so it may look a bit blocky. >:D


Here is some of the renders I did in class today, I need to teak the chrome and glass a bit still. The character sheet/screen shot of the scooter has non sub-divided polygons so it may look a bit blocky. >:D


Nebula Scooter WIP
Just a W-I-P on the scooter for our (anpro) project. I have to hand in everything tomorrow afternoon; lots of stuff we have done will be posted....!! You will get to see better progression shots and a variety of polymeshes.

>:D

>:D
Drill 5 Try 2 Part 6
Here is what I had ending hour 6, some of the helmet needs to be changed and fixed up before I merge it so that’s why some parts on the helmet are not there. This week I will post it merged before I start on the textures!!


Drill 5 Try 2 Part 5b
End of hour 5 progress. I made the dress and the boots, made the geometry around the waste fabric. next is the glove armor and clothing details, last helmet pieces.


Drill 5 Try 2 stating Part 5
This is what I have set up for reference finally to start hour 5. I will use these for and the boots, the dress will be over the pants. I found that the form itself was very fitting. I will start at 11:00am in 15 minutes.


Drill 5 Try 2 Part 4
Here is the progress after 4 hours. I added the glove that goes under the arm armor, got the rough shapes in for the helmet.


Subscribe to:
Posts (Atom)